If your Google Pixel 7 Pro is draining battery too fast after updating to Android 14, you’re not alone. Many users have reported this problem. There are a number of things you can do to fix the problem, but it can be difficult to know where to start.
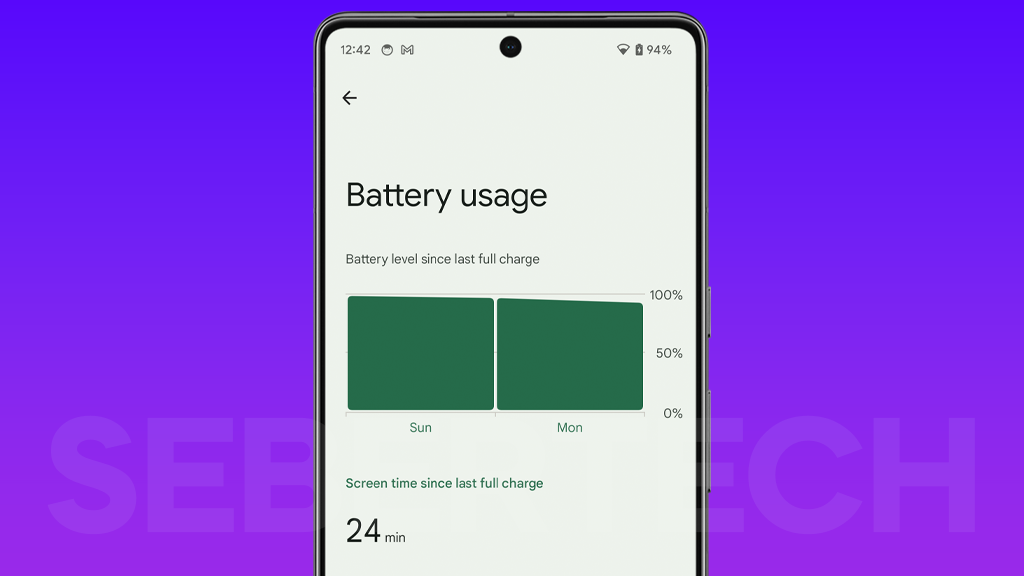
This article will provide you with a step-by-step guide on how to fix battery draining too fast on the Google Pixel 7 Pro after updating to Android 14. You will learn how to check for software updates, restrict background app activity, reduce screen brightness, turn off features you don’t use, use battery saver mode, and reset your phone.
Sections
Why is my Pixel 7 Pro draining battery so fast after the update?
The most common causes of battery draining too fast on the Google Pixel 7 Pro after updating to Android 14 are:
- Software glitches: Sometimes, minor software glitches can cause battery drain. Restarting your phone or updating to the latest software version can often fix these glitches.
- Background app activity: Apps that are running in the background can continue to drain your battery, even when you’re not using them.
- Screen brightness: The screen is one of the biggest battery hogs on your phone. Reducing the screen brightness can help to improve battery life.
- Features you don’t use: Features like Bluetooth, Wi-Fi, and location services can drain your battery if you’re not using them. When you’re not using them, turn them off.
- Hardware problems: In rare cases, a hardware problem with your Pixel 7 Pro may cause battery drain.
ALSO READ: How to Enable or Disable Wireless Emergency Alerts on Google Pixel 8 Pro
Restart your phone
Restarting your phone is a good troubleshooting step for a variety of problems, including battery drain. When you restart your phone, it clears out all of the temporary data and settings that may be causing the problem. It also gives the phone a chance to start fresh and load all of the necessary services and apps.
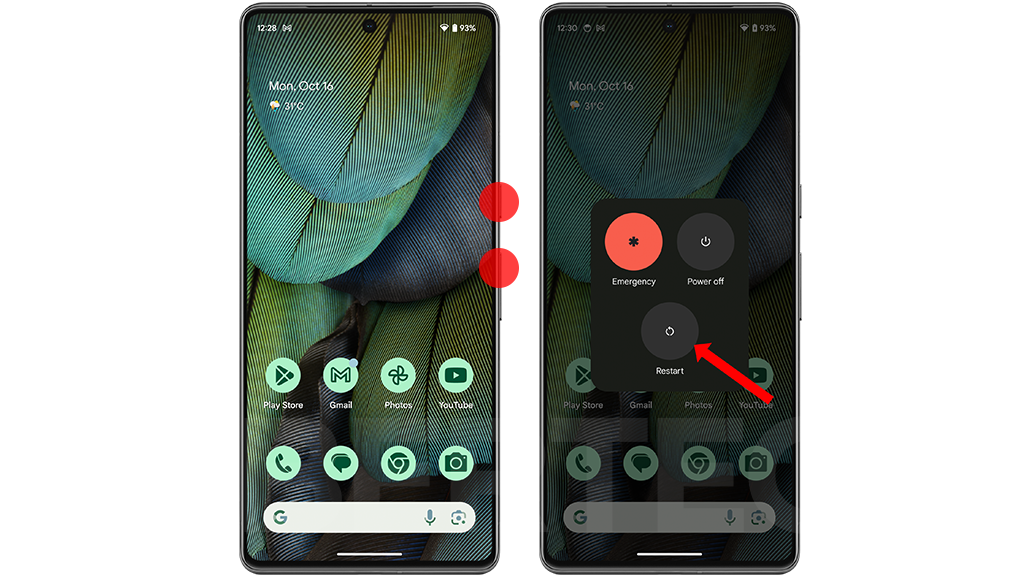
To restart your Pixel 7 Pro, press and hold the Power button and the Volume Up rocker at the same time. Then, tap on Restart.
Here are some additional benefits of restarting your phone:
- Can improve performance by freeing up memory and resources.
- Can fix minor software glitches that may be causing problems.
- Can resolve connectivity issues, such as problems with Wi-Fi or Bluetooth.
- Can improve battery life by clearing out temporary data and settings that may be draining the battery.
If you’re having any problems with your Pixel 7 Pro, be sure to try restarting it as a first step. It’s a quick and easy way to fix a variety of problems.
Check for updates
You have to check for updates because software updates often include bug fixes and performance improvements. It is possible that the battery drain problem on your Pixel 7 Pro is caused by a software bug. By checking for and installing software updates, you can fix the bug and improve your battery life.
To check for software updates on your Pixel 7 Pro, follow these steps:
- Open the Settings app.
- Tap on System.
- Tap on System update.
- Tap on Check for update.
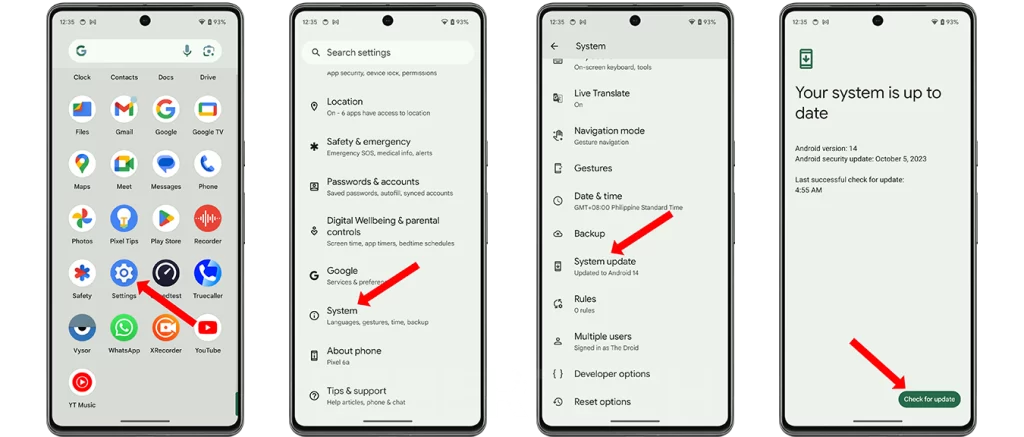
If there is an update available, your phone will download and install it.
Here are some additional tips for updating your Pixel 7 Pro:
- Make sure that your phone is connected to a Wi-Fi network.
- Make sure that your phone is charged to at least 50%.
- Back up your important files before updating your phone.
Check your battery usage
You should check your battery usage to identify the apps and features that are draining your battery. This information can help you to troubleshoot the problem and take steps to improve battery life.
To check your battery usage on a Google Pixel 7 Pro, follow these steps:
- Open the Settings app.
- Tap on Battery.
- Tap on Battery usage.
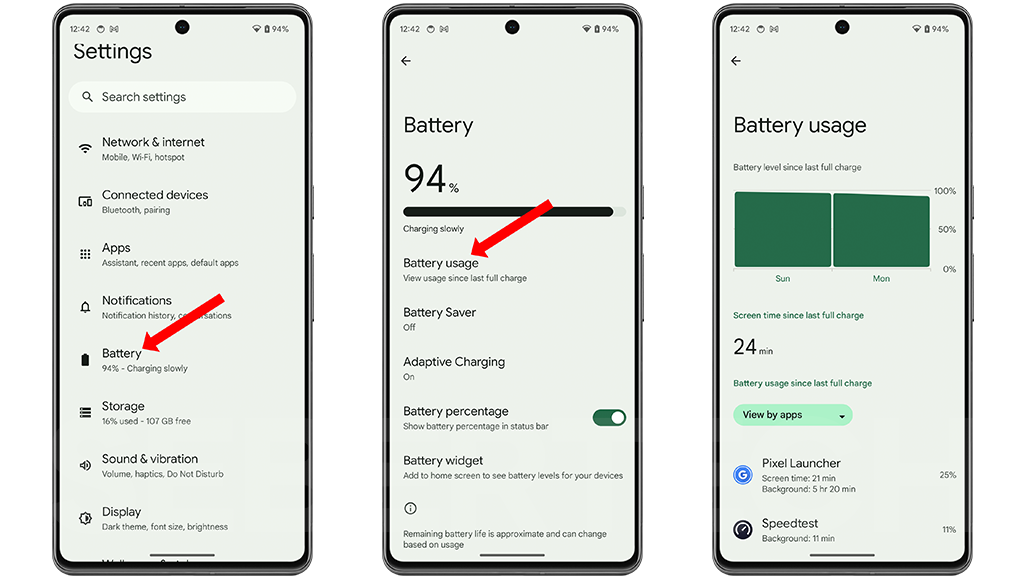
This will show you a list of the apps and features that are using the most battery on your phone. You can also tap on the “Show system” toggle switch to view a list of system apps and features that are using battery.
Reduce screen brightness
You have to reduce screen brightness because the screen is one of the biggest battery hogs on your phone. Reducing the screen brightness can help to improve battery life.
The screen brightness controls how much light is emitted from the screen. A higher brightness setting will use more battery, while a lower brightness setting will use less battery.
To reduce screen brightness on your Google Pixel 7 Pro, follow these steps:
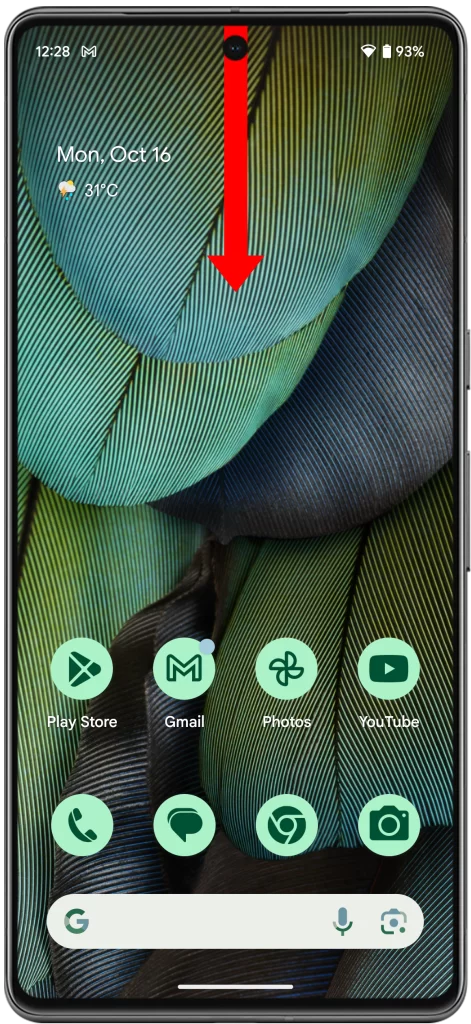
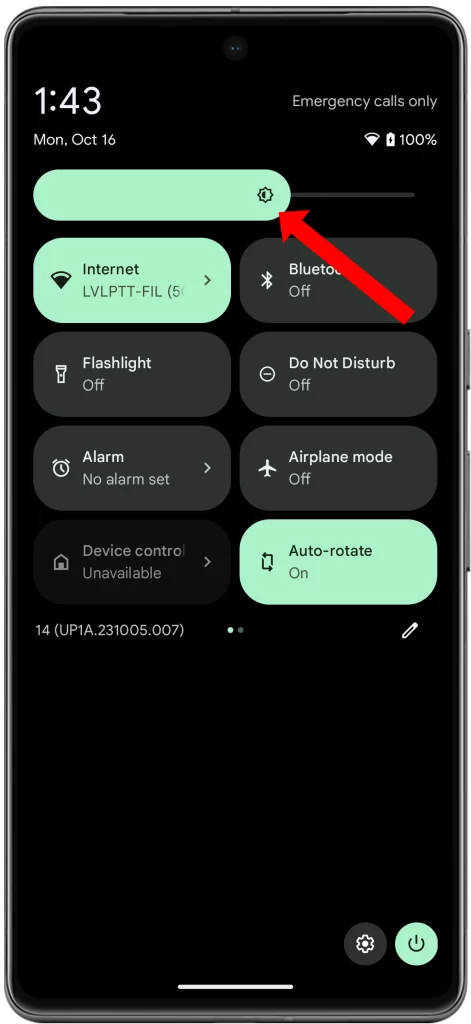
- Swipe down from the top of the screen twice to pull down the Quick Settings menu.
- Drag the slider to the left to reduce the brightness.
You can also adjust the screen brightness in the Settings app. To do this, follow these steps:
- Open the Settings app.
- Tap on Display.
- Drag the brightness slider to the left to reduce the brightness.
Reducing screen brightness can help to improve battery life on your Google Pixel 7 Pro, especially if you use your phone in low-light conditions.
Turn off features you don’t use
You have to turn off features you don’t use because they can drain your battery even when you’re not using them. For example, if you have Bluetooth turned on but you’re not connected to any Bluetooth devices, it will continue to drain your battery.
Turning off features you don’t use can help to improve battery life by reducing the number of apps and services that are running in the background. This can also help to improve performance by freeing up resources on your phone.
To turn off features you don’t use, you can go to Settings and then tap on the feature you want to turn off. For example, to turn off Bluetooth, you would go to Settings > Connected devices > Bluetooth and then tap on the toggle switch next to Bluetooth to turn it off.
You can also turn off features you don’t use by using Quick Settings. To do this, swipe down from the top right corner of your screen to open Quick Settings. Then, tap on the Edit button (the pencil icon) and drag the features you want to turn off to the Quick Settings panel. Once you’re finished, tap on the Done button.
Use battery saver mode
Battery saver mode is a feature that can help to improve battery life by restricting background app activity and reducing screen brightness. This can be helpful if you’re experiencing battery drain after updating to Android 14.
To use battery saver mode, follow these steps:
- Open the Settings app.
- Tap on Battery.
- Tap on Battery saver.
- Tap on Turn on now.
You can also choose to turn on battery saver mode automatically when your battery reaches a certain percentage. To do this, follow these steps:
- Open the Settings app.
- Tap on Battery.
- Tap on Battery saver.
- Tap on Schedule.
- Tap on Turn on based on battery level.
- Drag the slider to the desired battery level.
When battery saver mode is turned on, you’ll see a battery saver icon in the status bar. You can also see a list of the features that are restricted in battery saver mode by going to Settings > Battery > Battery saver > Restrictions.
Battery saver mode can help to improve battery life, but it’s important to note that it may also affect the performance of your phone. Some apps may not work as well or may take longer to load. If you need to use all of the features of your phone, you can turn off battery saver mode by tapping on the battery saver icon in the status bar and then tapping on Turn off.
Reset your phone
You may need to reset your phone if you have tried all of the other troubleshooting steps and you are still having battery problems on your Google Pixel 7 Pro after updating to Android 14.
Resetting your phone will erase all of the data and settings on your phone and restore it to its factory default state. This can sometimes fix battery problems that are caused by software glitches or corrupted data.
To reset your Pixel 7 Pro, follow these steps:
- Open the Settings app.
- Tap on System.
- Tap on Reset options.
- Tap on Erase all data (factory reset).
- Tap on Erase all data.
Your phone will restart and begin the reset process. Once the reset process is complete, your phone will be restored to its factory default state. You will need to set up your phone again and reinstall any apps that you want to use.
Note: Resetting your phone will erase all of the data and settings on your phone. Be sure to back up your important files before you reset your phone.